If you train long enough and hard enough, at some point, you are going to get injured. One of life’s ironies is that training to be strong and muscular can also result in aches and pains that most sedentary people manage to avoid.
Broadly speaking, there are two main types of injuries – acute and chronic. Acute injuries come on suddenly and are usually the result of training too hard, e.g., attempting an extra rep when you are already exhausted or trying to lift too much weight. Acute injuries include muscle strains and joint sprains.
Chronic injuries come on gradually and are caused by issues like habitual poor exercise technique, muscle imbalances, not getting enough rest, or repeating the same movement over and over. Chronic injuries result in inflammation and usually worsen over time.
Acute and chronic injuries usually heal themselves in time and may even heal faster with complete rest. However, just because you have an injury in one part of your body doesn’t mean you cannot train the rest of your muscle groups.
As a dyed-in-the-wool lifter, the last thing you probably want to do is stop training because of an injury. Missing workouts can affect you mentally as well as physically. And the good news is that you may not have to. In fact, in many cases, it’s possible to train around even severe injuries safely.
In this article, we reveal the nine best strategies you can use to keep on training even when you are injured.
[sc name=”style-blue-box” ]
Medical Warning!
While you may be able to train around many injuries, some cannot be circumnavigated safely.
For example, if you have a mild injury, e.g., a biceps strain, you probably don’t need medical attention, and rest, ice, compression, and elevation (the RICE protocol) will have you back to full strength in a couple of weeks. You are an ideal candidate for the information within this article.
However, if you have a more severe injury, such as a muscle or tendon rupture, a prolapsed intervertebral disk, a hernia, or a broken bone, you should speak to your doctor before returning to the gym.
Finally, remember to exercise your common sense along with your muscles. If training around an injury results in more pain, you’re doing something wrong and should reevaluate your situation to make sure you aren’t making things worse.
In some cases, a complete break from training may be unavoidable.
[/sc]
The Best Strategies for Training Around Injuries Safely
Depending on the location and severity of your injury, these are the strategies you can use to keep on training around whatever it is that ails you!

1. Train the non-injured limb only
In the case of single limb injuries, training one side of your body can help preserve muscle and strength in the other side of your body (1). This is called cross-education. For example, suppose an elbow injury prevents you from using your left arm. In that case, you can perform unilateral exercises on your right side to avoid atrophy.
This method also works with your lower body. For instance, if you had a knee issue, you could do single-leg presses to maintain strength and muscle size on your injured side.
2. Use less weight and a slower tempo
Starting a rep of any exercise puts a lot of tension on your muscles and connective tissue. That’s because moving a stationary object takes a lot of force. This is called overcoming the moment of inertia.
The heavier the load, the more inertia you need to overcome, and the more stressful the exercise is for the connective tissues. You can reduce the structural demands of any exercise by using less weight and moving more slowly. This is often called super slow training.
Using 30-50% of your usual training load, lift and lower your weights much more slowly, taking 5-6 seconds for the concentric and eccentric phases. Do not pause at the top or bottom of your reps to keep constant tension on your muscles.
This constant tension means you will only need to do a few reps to fatigue your muscles. 5-8 reps should be plenty, even though you are using a light load. For example, six reps of five seconds up and five seconds down adds up to a TUT of 60 seconds, which should be plenty hypertrophic.
With less stress on your joints and connective tissue, you should find you can continue training and making gains even if you are injured. This is a good option when suffering from things like mild muscle tears and chronic tendonitis.
3. Switch to machines
Injuries are often made worse by extraneous movements and unstable exercises, such as when a barbell wobbles during bench presses. You may experience some relief if you replace the freeweight activities in your workout with the nearest machine equivalent.
Machines guide your movements, so you don’t have to worry about stabilizing the load. Most also provide lower back support, which will be welcome if you are suffering from back pain.
Machines are also ideal for low weight/slow tempo training – see point #2 for further details.
4. Reduce your range of motion
Some injuries feel worse when you use a large range of motion. Big ranges of motion can put a lot of stress on your joints and may also over-stretch your muscles. You can preserve strength and mass while saving your muscles and joints from unnecessary stress by purposely reducing your range of motion.
Examples include:
- High box squats instead of full squats
- Floor presses instead of bench presses
- Rack pulls instead of conventional deadlifts
- Seated barbell curls instead of full biceps curls
Work within your pain-free range of motion but, as your injury heals, gradually increase the movement to avoid causing any unwanted adaptive shortening.
5. Vary your grip or stance
Most lifters have a favorite grip for exercises like barbell curls, pull-ups, and bench presses. They probably also use the same stance for squats, deadlifts, and leg presses.

While it’s nice to know exactly where you are going to put your hands and feet, using the same grip or stance could be the reason you have chronic aches and pains. Doing the exact same movement over and over can cause pattern overload, putting a lot of stress on the same part of your body repeatedly.
Varying your grip or stance can help move this stress to other parts of your body, allowing any overuse injuries time to heal. Experiment with different grips and stances to see if you can find a pain-free position that will enable you to continue training.
In many cases, narrower grips and stances are more joint-friendly. The closer your limbs are to the midline of your body, the easier it is to maintain joint stability.
Read more: Best Grip Variations for bodybuilding
6. Try isometrics
If movements bother your joints, try exercising without moving, i.e., isometrics. An isometric exercise is one where your muscles contract, but your joints remain stationary. There are two types of isometric training – yielding isometrics and overcoming isometrics.
With yielding isometrics, you support a weight with your muscles and hold the load statically for time. Examples include:
In contrast, overcoming isometric exercises involve pulling or pushing against an immovable object, such as a super-heavy weight, yoga strap, wall, or fence post.
For example, this is an overcoming isometric squat using a strap for resistance:
Isometric exercises allow you to generate lots of muscle force with minimal strain on your joints. They’re also helpful for reinforcing your mind-muscle connection. Better muscle control may help prevent future injuries. Isometrics are the injured lifter’s best friend!
7. Use resistance bands
As discussed back in point #2, getting a weight moving is one of the most stressful parts of any exercise. This strength curve is reversed when you use resistance bands, and the tension gradually increases as you extend your limbs.
Invariably, this is easier on your joints, muscles, and connective tissue than traditional forms of overload but will still deliver an effective workout.
You can use resistance bands on their own or in combination with freeweights. Just use less weight than normal to avoid overloading your muscles and joints in a mechanically disadvantageous position. Rely on the band(s) to provide most of the overload.
8. Make the switch to low-impact cardio

While we’ve focused exclusively on training around strength training injuries so far, it’s worth noting that cardio can cause aches and pains, too. In fact, the sore knees and back pain that bother you during squats could be the result of running for fat loss or doing too many burpees or box jumps.
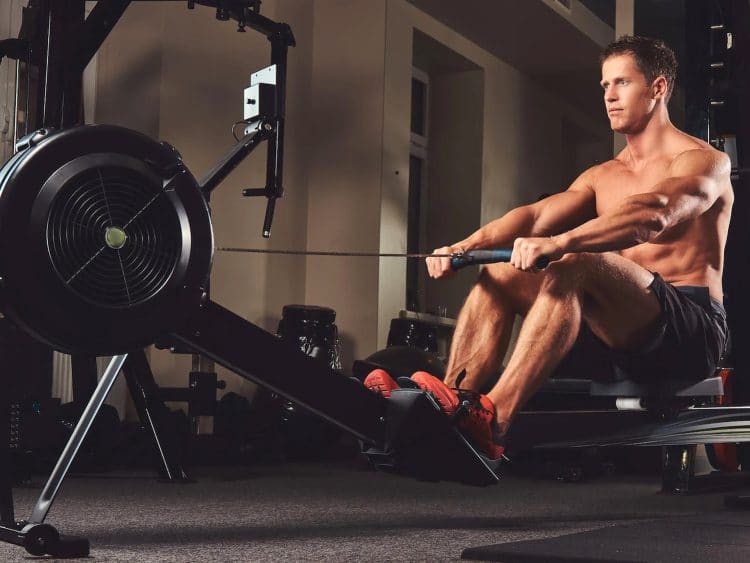
You can work around leg and lower back pain by eliminating high-impact exercises from your workouts and doing more low-impact cardio instead. Examples of low-impact cardio include:
Running and jumping mean your feet hit the floor with force equal to anywhere from five to eight times your body weight. So, it’s not really surprising that high-impact cardio can cause joint pain. Low-impact cardio is just as effective but far more joint-friendly and a much better option for heavier exercisers, regardless of whether that weight is fat or muscle.
Read more about cardio for big guys here.
9. Try a different joint angle
If there is one thing that’s almost guaranteed to cause inflammation and joint pain, it’s working your muscles from the same angle every time you train. Overuse injuries are all too common in lifting circles.
So, if you have joint pain, give yourself a break and try hitting your muscles from a different angle. You may find this provides you with some rapid relief.
For example, if you always do flat bench presses with a medium grip, try narrow grip incline presses to see if that is more comfortable. Similarly, if barbell overhead presses bother your shoulders, switch to pressing dumbbells at a 70-degree angle.
Small changes in body position can have a significant effect on joint health and function.
Wrapping Up
Injuries are frustrating, especially if they keep you out of the gym. But, rest assured, you are not the first person to miss training because of injuries, and you won’t be the last. Lifters much more experienced than you have suffered gym-related injuries and managed to bounce back, and you can, too.
That said, your injury may not need time away from the gym to heal. In fact, you might be able to train around it and maintain your gains or even keep making progress. Inevitably this will require some changes to your workouts, but that’s preferably to not being able to train at all.
So, the next time you have a strain or sprain, or your joints are aching, break out the resistance bands, try some unilateral training, do isometrics, or try super-slow training. These are just four of the nine training strategies in this article that are ideal for injured lifters.
Finally, always defer to a medical professional if your injury is more serious. Sometimes rest is the only way for damage to heal. However, you should still try and remain active and make sure you do your rehab – doctor’s orders!
References:
1. American Physiological Society: Unilateral strength training leads to muscle-specific sparing effects during opposite homologous limb immobilization https://journals.physiology.org


